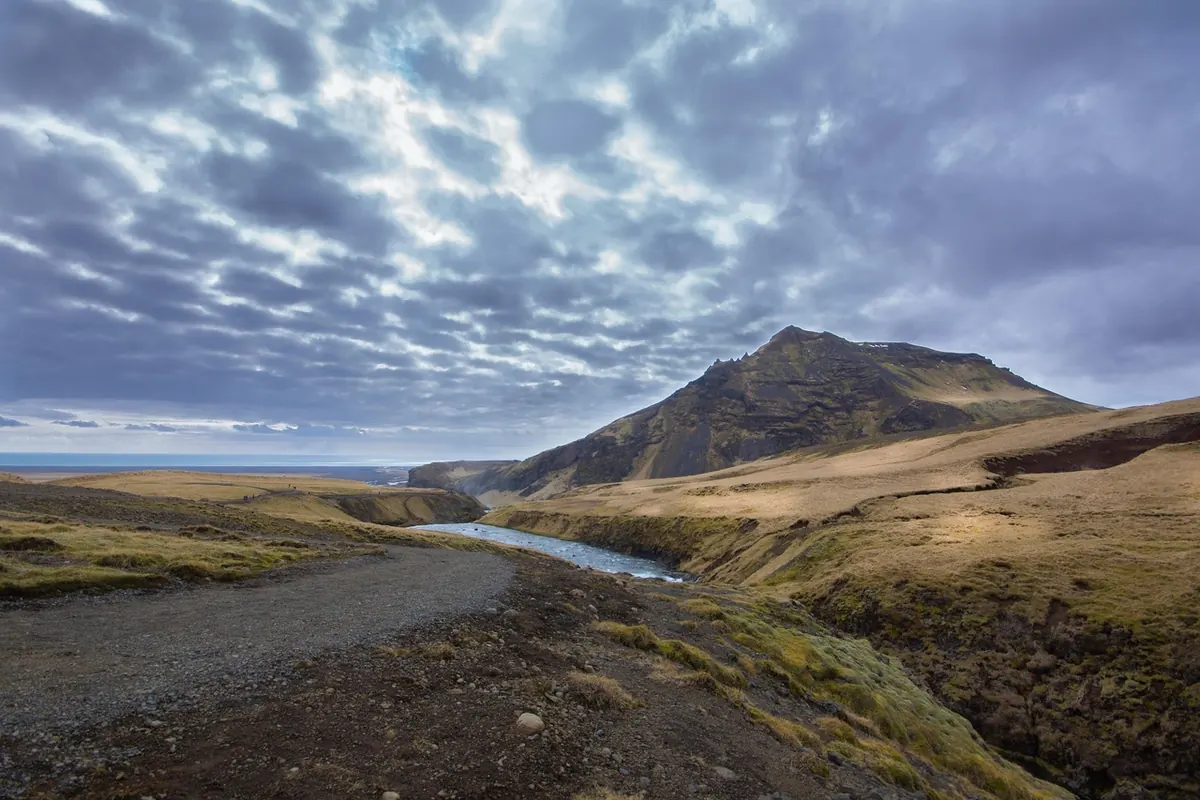
You have climbed for two hours. The cloud is sitting on your boots, the summit cairn is a grey smudge and the view you came for is a soft white nothing. The camera comes out anyway. Flat light is the normal condition in the British hills for much of the year, and it is not a consolation prize. Overcast skies and mist soften rock, split ridges into bands of tone, remove the harsh contrast that ruins midday sun, and give a photograph a mood that a blue-sky afternoon rarely manages. The trick is to stop photographing the view you wanted and start photographing the one you have.
1. Stop waiting for the sun
Standing on a summit for an hour hoping for a break in the cloud is a reliable way to get cold and come home with nothing. If a shaft of light does arrive, be ready for it — but plan the day around what you have.
Flat light actively suits certain subjects: wet slate, moss and lichen, moving water, the inside of a corrie, a single tree against a hillside. It also turns the whole sky into one enormous softbox, which means no blown highlights and no squinting at a histogram that looks like a mountain range in itself. Work close, work quiet, and let the weather set the tone.
2. Build depth with layers instead of shadows
Direct sun hands you shadows that describe shape and distance. Take that away and you have to construct depth yourself. The most useful tool is aerial perspective: in mist, each successive ridge is paler and lower in contrast than the one in front of it. Stack three or four bands of tone and the picture reads as depth even without a single hard shadow.
In practice, this means moving your feet. Shift twenty paces left or right until the nearest ridge, the middle distance and the far summit sit clearly apart rather than merging into one outline. A short telephoto setting — somewhere around 70–120mm on a full-frame camera — compresses those layers and makes the stacking more obvious. Check the edges of the frame before you press the shutter; a stray branch or a walker half in shot is more distracting on a flat day, because there is nothing else for the eye to do.
3. Give your foreground a job
A foreground should do at least one of three things: show scale, lead the eye into the picture, or tell the viewer where they are standing. If it does none of those, it is just a closer piece of grass.
- Wet rock or slate — dark, glossy and full of texture, it holds tone when the sky is bright.
- A lochan or puddle edge — reflections of grey cloud can be the brightest, most interesting thing in the frame.
- Tussock grass, heather or bracken — good for warm colour, but get low and let it fill a corner rather than a whole third.
- Fence posts, drystone walls, a ruined bothy — human traces give scale and a sense of place.
- Footprints in snow or mud — a simple line that pulls the eye towards the ridge ahead.
Get the camera down to knee or boot height. From eye level, foregrounds flatten into nothing; from low down, they become shapes.
4. Expose for the brightest thing that matters
On a grey day the sky can still be several stops brighter than the land. Decide which one you care about, then expose for it. Expose for the mist and let the hillside fall into shadow and you get a quiet, moody, minimal picture. Expose for the land and let the sky go white and you get something closer to a high-key study of texture.
Two approaches work well. Either set the exposure so the brightest part of the mist sits just below clipping — watch the highlight warning on the back of the camera — or bracket a couple of frames a stop apart and choose later. When the sky is bright and the foreground dark, a soft graduated neutral density filter still earns its place in the bag. If you are using a polariser, remember it cuts one to two stops of light and does very little on an overcast day except darken the sky unevenly; often it is better left off.
5. Treat mist as the subject, not the problem
Mist changes by the minute, and that is the whole point. Set up where ridges emerge and disappear, and wait. A long lens is ideal here: pick out one summit floating above a sea of cloud and let the rest go. Look for gaps, and watch how the light behind you shifts as the cloud thins — a patch of brightness in the distance is often all the contrast a picture needs.
Keep the camera out of the bag and switched on, with a cloth in your pocket for the front element. If you only take the camera out when the scene looks perfect, you will spend most of the day with it in your rucksack.
6. Notice what grey reveals: colour and texture
Dull weather does not mean a dull palette. Wet rock, deep green moss, russet bracken, slate blue water, lichen in orange and pale grey — these colours read strongly under soft light, precisely because nothing is blowing out. Look for small scenes: a stream pouring through boulders, frost on a fence wire, raindrops on a leaf, the orange of a waterproof against grey stone.
One setting worth changing is white balance. Automatic white balance tends to render overcast scenes cold and blue. The Cloudy or Shade preset, or a manual setting around 6000K, restores some warmth and makes grass and rock look the way your eye saw them. Shoot raw if you can, and fine-tune later on the computer rather than fighting it on the hill.
7. Keep your kit — and your routine — simple
Grey days are usually wet days, and fiddling with gear in the rain is how photographs get missed. A few practical habits make the difference:
- Carry two lens cloths in a dry pocket, not one in the bag.
- Keep spare batteries in an inside pocket; cold drains them quickly.
- Use a rucksack liner or dry bag rather than trusting a rain cover alone.
- Take a lightweight tripod if you want slow shutters for water or long views through mist.
- Work at ISO 100–400 and around f/8–f/11, and use the self-timer or a remote release when the tripod is out.
And the usual hillcraft applies, more so in cloud: check a mountain weather forecast before you leave, carry map, compass and waterproofs, and tell someone your route. No photograph is worth a navigation error in poor visibility.
A five-minute routine for grey days
When you arrive somewhere promising, resist the urge to shoot immediately. Stand still for two minutes and look at what the weather is actually doing — which ridges are visible, where the mist is thickening, which direction it is drifting. Then ask yourself one question: what is this picture about? The mist, the layered ridges, or the wet rock at your feet?
Pick the answer, choose a foreground that supports it, get low, and set your exposure for the brightest part of the scene. Take eight or ten frames rather than one, adjusting your position slightly each time. Then walk twenty paces and start again. Flat light rewards patience, small movements and a willingness to photograph the hill as it is today — which, more often than not, is more atmospheric than the postcard version you had in mind.
Photo: Lockenkopf / Pixabay